The Ultimate Test Sieve Guide

Particle size analysis ensures product quality by examining individual particle sizes. Test sieves are essential tools in this process and have improved in strength and reliability. This guide will explain test sieves and how they can enhance your work.

Test-Sieves

Chapter 1

What Is a Test Sieve?

A test sieve is a tool used for analyzing particles. It has a mesh screen with even openings, which is set onto a frame. It helps to sort particles in a material sample and shows the size distribution of those particles.

As they have been used for centuries, there are industry standards that dictate the sieve types and specifications you should use.

What Components Make Up a Test Sieve?

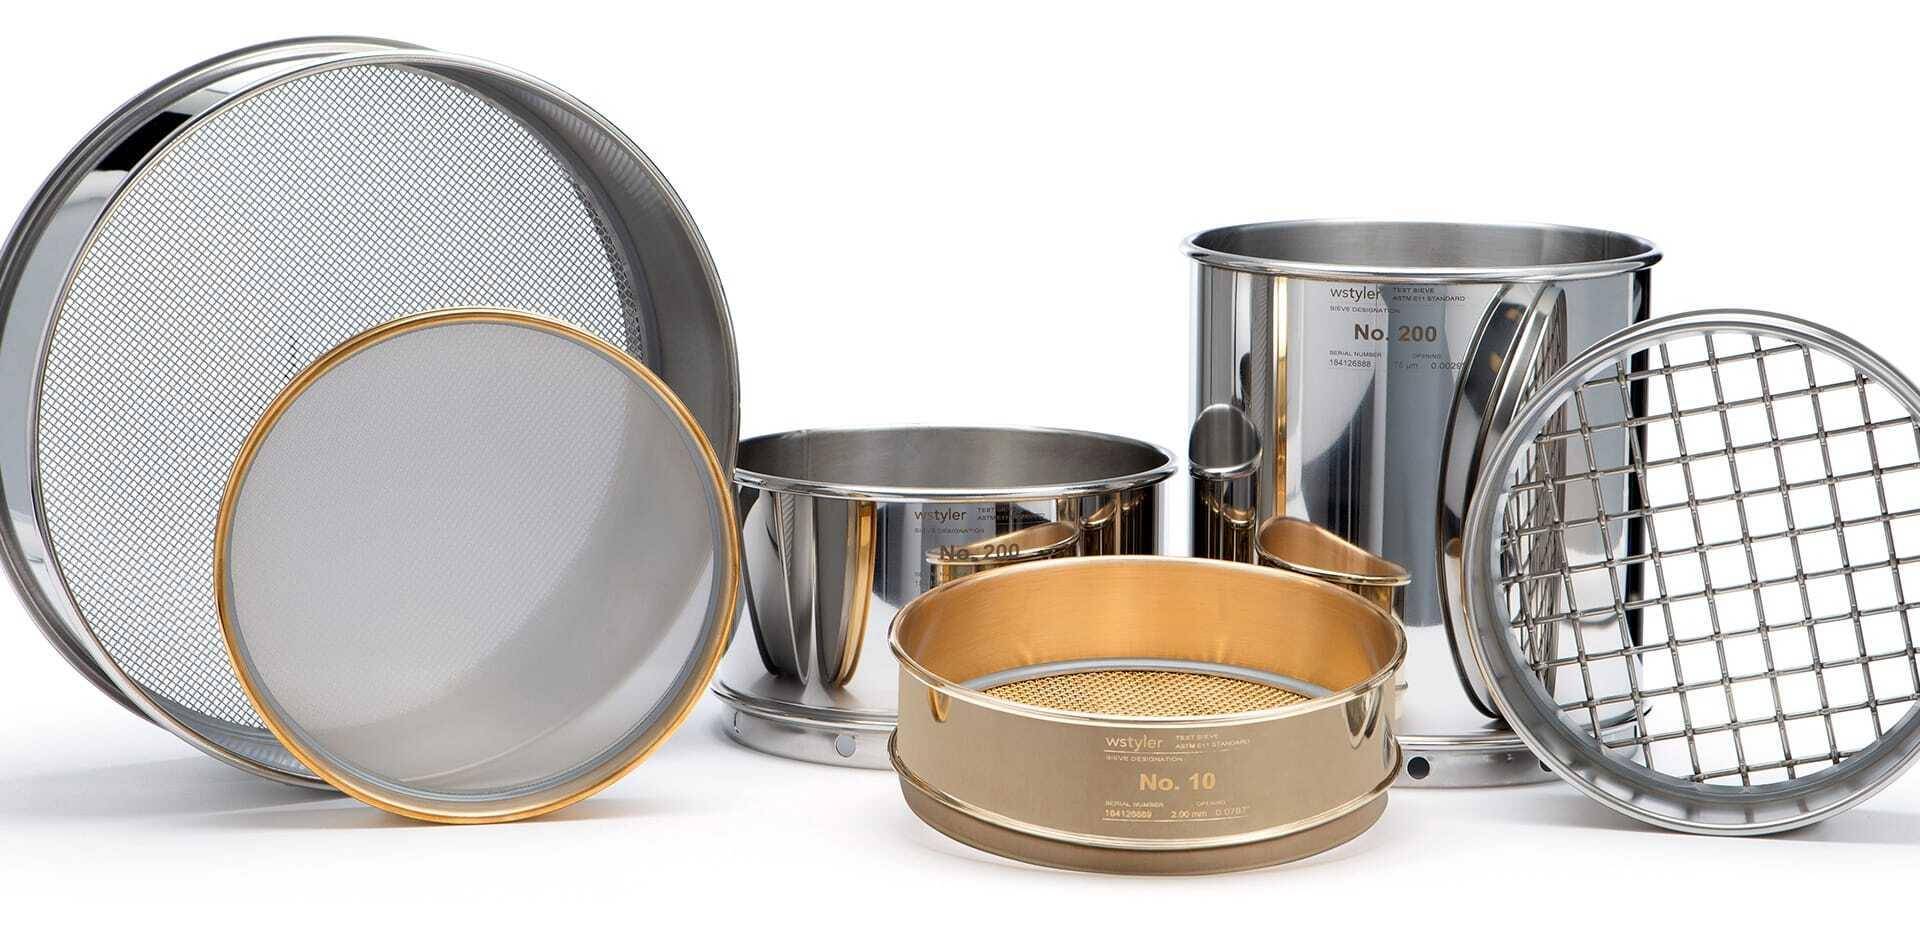
Most test sieves are constructed from a frame, a skirt, and some sort of screen. The frame is designed to provide space between sieves when stacked, which allows the particles to be distributed evenly.

Now, test sieves are generally available in 3-inch, 8-inch, or 12-inch variants in the United States. This is equivalent to 100 millimeters, 200 millimeters, and 300 millimeters internationally.

The skirt of a sieve serves as a supportive element that prevents them from moving erratically when conducting a test sieve analysis.

Finally, the screen serves as a filter that separates the particles based on their size. This gives you insight into the quality of the material on your production line.

Stainless steel woven wire mesh is most widely used as it has a screening range of 4″ (100mm) to 635 mesh (20um), while providing maximum durability. That said, perforated plate is another screening media that is commonly used.

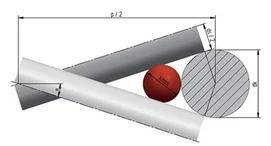
NOTE: Test sieve cloth is woven differently than other mesh products. The loom must be monitored closely to ensure the mesh openings are exact and comply with the tolerances set by ASTM or ISO.

How Are Test Sieves Made?

Test-Sieve-Set
Typically, the materials that are used to assemble our test sieves are produced and stored within the facility. This allows us to have complete control of the construction process and ship orders promptly.
To that end, the assembly process of a test sieve goes as followed:
NOTE: Test sieves are not sterilized during or after the assembly process. This means that heavily regulated materials, such as food and pharmaceutical samples, should not be reintroduced into production after testing.

How Do Test Sieves Work?

Test sieves are used to conduct test size analysis in a wide range of industries. When it comes to how they work, think of the process used to pan for gold.
As the pan is shaken, the small particles of dirt fall through the screening media, leaving the larger gold particles behind. This function is exactly how test sieves are used to test a representative sample’s particle size and ensure a specific level of quality is met.

A sieve shaker is a particle analysis instrument that is employed to agitate your test sieve stack and promote particle movement. That said, hand sieving can be used to create the same level of agitation.

Dry vs Wet Test Sieves

In the world of test sieves, there are two general variations of sieves: dry test sieves and wet wash test sieves.
Dry test sieves are designed to test dry, free-flowing particles that can move through the sieve with a simple shaking or tapping motion. Wet test sieves are designed to test particles that require the presence of water to pass through your sieve(s) properly.

Wet test sieves are commonly used in the aggregate industry because clay and silt stick to aggregates, making them appear larger than they are. Using water removes this dirt, ensuring accurate testing.

Chapter 2

How Much Do Test Sieves Cost?

Five factors influence the overall cost of a test sieve. These factors include the type, alloy, mesh size, sieve size, and certification.

Types of Sieves

Stainless-Steel-Test-Sieve

Dry Test Sieves

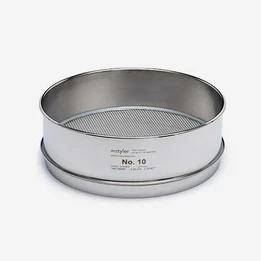
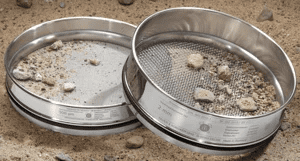
Dry test sieves are generally what are used to conduct a test sieve analysis (see below). They have the frame, skirt, and wire mesh screen profile that was discussed above.
Lab technicians can use them individually during a hand sieve analysis or in a sieve stack that is placed in a sieve shaker.

Wet-Test-Sieve

Wet Test Sieves

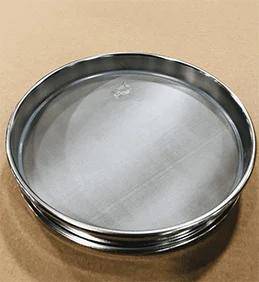
As these test sieves are designed to be used for wet sieve analysis, they are constructed using a deeper frame profile. Having said that, they utilize the same wire mesh screening media as dry sieves.

Wet-Test-Sieve

Sonic Sieves

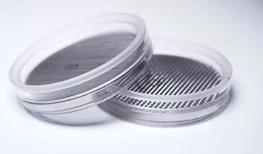
Test sieves fabricated with a 3-inch acrylic frame, allowing them to fit sonic separator devices. Their transparent frame allow you visually see how well sample material is traveling through the stack.
This, in turn, allows you to make adjustments to your sonic sieve analysis on the fly.

Frame Diameter

Sieve frame diameter indicates the sieve size. Standard sizes include 3-inch, 8-inch, and 12-inch, with additional options like 6-inch, 10-inch, 18-inch, 200mm, and 300mm.
NOTE: Standard sizes are cheaper as they are made in surplus and stocked, making them more affordable to produce.

Sieve Height

When it comes to sieve height, you can get them at full-height or half-height. Half-height sieves are typically used to accommodate sieve stacks that have a larger number of sieves.

A good rule of thumb to follow is: the taller the sieve; the more expensive the sieve will be. This is because taller sieves require more material to be created.

Mesh Size

Standing as the most critical element of a test sieve, the mesh size you choose will have the most significant impact on the price of your sieves. Sieve mesh, in particular, is available with a mesh opening range of 4 inches down to 20 micron.
That said, the finer the mesh gets, the more expensive it will be.
Looking at the wire themselves, fine wires take a longer time to draw as the wire supplier must be delicate with finer wires. When being woven, fine wire takes longer to be threaded through the weaving loom, and the loom must be run much slower.
In other words, the production of fine mesh is very labor-intensive. To that end, when the openings exceed 4 inches, perforated plate should be used.
Regardless, the mesh you should use is illustrated and determined in your industry standards.

Sieve Alloy

Stainless steel is the preferred alloy to use for test sieve fabrication, as it is more durable and cost-effective.
Use brass test sieves (with a brass frame and mesh) only for materials that may spark. For pharmaceutical and food applications, use stainless steel sieves (made entirely of stainless steel).
But they are also ideal for testing abrasive materials as brass is much softer than stainless steel and is more likely to be damaged.

Chapter 3

How to Apply the Standard Metric and U.S. Sieve Cloth Conversion Table

What Is the Standard Metric and U.S. Sieve Cloth Table?

Woven-Wire-Mesh-Plain-Weave
It was designed to help lab technicians accurately convert these standards with ease.
The standard metric and U.S. sieve cloth table helps convert a sieve’s mesh opening to a specific ASTM or ISO mesh size. These are the most commonly used standards in particle analysis.
For example, if you require a 1mm test sieve but the test sieve supplier only offers #18 sieves and sieves with a .0394-inch mesh opening, the conversion table would help you identify that each option would provide the same level of screening.

How the Standard Metric and U.S. Sieve Cloth Table Helps Design the Perfect Mesh

The ASTM/ISO standards both guide the majority of wire mesh production operations throughout the world. This means companies are sometimes not familiar with mesh specifications that are outside these two sets of criteria.
But what if a customer requests a unique specification?
Well, let’s say a customer requests a U.S. #43 test sieve. This specification is outside the standard U.S. #40 mesh and a U.S. #45 mesh that follows ASTM standards, as well as the 400-micron mesh that follows ISO standards and falls between U.S. #45 and U.S. #40.
The standard metric and U.S. sieve cloth conversion table would be used to help identify a mesh count that is the closest to the mesh size the customer needs.

Why Have Different Measurement Standards?

Standard designations vary throughout the world simply because there are different unit measurements used. ISO standards, for instance, represent the metric system that is popular across the globe, while ASTM standards represent the American imperial system.
Having these different measurement standards allow lab technicians to communicate with other technicians in their industry no matter what measurement unit they use to regulate their operation.
mesh-specification

How Does the Price of ASTM and ISO Specifications Convert?

When it comes to the price difference between ASTM- and ISO-regulated wire mesh, there is no difference. In other words, an 8-inch, full-height, U.S. #10 test sieve will cost the same as its ISO-regulated counterpart.

Lead times between ASTM- and ISO-regulated mesh, however, do vary. This is because ASTM-labeled sieves are generally in higher demand thus more readily available.

Chapter 4

How to Prepare a Sample for Test Sieve Analysis

A representative sample is a portion of material that is used to represent the entire production line. As your representative sample’s size and consistency dictate how you conduct your particle analysis, it is the first step.

The overall size of your sample (mass and quantity) is reflected and determined in your industry standards.

How to Properly Split Sample Material

Once a representative sample is gathered, it may need to be broken down further to move through your test sieves properly. This must be done while maintaining the accuracy of the sample.

Employing a material splitter is the best way to do this.

A material splitter is a device that is designed to accurately divide your sample into smaller samples that are easy to handle.
That said, sample splitters themselves are easy to use. Simply pour your material into the top of the splitter, evenly distributing the material from left to right.
If your splitter has a lever mechanism, push the mechanism either up or down to split your sample. If not, your sample should separate as you pour it into the feeder.
This process should be repeated until a manageable sample size is obtained. While a simple process, sample splitting should be done before each particle analysis test.

Breaking Down a Sample Using the Coning and Quartering Method

The most efficient way to accurately break down sample material, especially larger sample sizes, is to use the coning and quartering method.
How to Break Down a Sample With Coning and Quartering:
NOTE: Sampling directly from trucks or rail cars is not recommended. There are too many factors that can impact the material’s gradation, like particle breakdown during the loading, transporting, and unloading.

Chapter 5

Sieve Size vs Sample Weight

What Is Sample Weight?

Before analyzing particle size, break your sample into smaller, manageable weights. Sample weight refers to the weight of your sample before testing.
The starting weight is compared to the final weight of the material left after the analysis. Forgetting to note the starting weight can make it hard to create an accurate distribution curve.
This idea applies to physical test sieves, air jet sieves, and virtual sieves used in dynamic image analysis.
Controlling your sample weight will also help to ensure you are testing an appropriate sample size.
To that end, when a sample that is too large is tested, the particles may struggle to pass through the sieve(s). On the other hand, testing a sample that is too small may yield false results.

How Do I Accurately Calculate the Weight of My Sample?

The process of calculating sample weight starts with pinpointing a round number that adheres to the sample weight(s) that your industry standards specify. A collection pan should then be placed onto a scale that goes to at least the tenth decimal, and the weight of the pan recorded.
At this point, the scale should be tared to zero out the pan’s weight, and the sample material can be poured into the collection pan. If you fail to tare your scale at this point, you can subtract your pan’s weight from the weight of the pan plus the sample.

What Is Sieve Size?

Sieve size is a term that either describes the diameter or the mesh count of a sieve. Throughout this guide, sieve size will refer to the sieve’s diameter.
Sieves come in sizes of 12 inches, 8 inches, 3 inches, 300mm, or 200mm. Choosing the right sieve size is important for getting accurate results in your analysis.
This is because the sieve diameter ultimately dictates whether or not your sample material covers more than 50 percent of the screening media. When more than 50 percent is covered, the particles of the sample will have limited space to move, making it hard for them to find the openings of the mesh or even clogging the screen media.

How to Select the Right Sieve Size?

Choose a sieve size based on the particle size you need to analyze. For example, if your particles are no larger than 1 inch, use a sieve suitable for that size.

Typically, test sieves up to 8″ in diameter would be ideal for testing these particles accurately. If your sieve analysis operation resembles this, you can identify which sieves within this sieve size range are best suited for you in your industry standards.

To that end, particles with an average size larger than 1″ may produce more accurate results when placed in 12″ sieves. This is because these sieves are slightly deeper, providing more room for larger particles to find the mesh openings efficiently.

How Does Sample Weight and Sieve Size Complement Each Other?

Bringing sample weight vs sieve size into perspective, obtaining the weight of your representative sample(s) is the starting point of any test sieve analysis and dictates the accuracy of your final particle analysis results.

After the sample weight is recorded, you must run the sample through a test sieve stack to generate a reliable distribution curve. This is where having the correct sieve size is everything.

The sieve size you choose will dictate the particles’ ability to find the openings in the sieve mesh properly. When it comes time to weigh the sample material retained on each sieve, each fraction of material should ultimately add back up to the original sample weight and provide a true overview of your production line.

Chapter 6

How to Perform a Test Sieve Analysis

How to Prepare for a Test Sieve Analysis?

Before starting a test sieve analysis, collect a representative sample using the methods explained earlier for the best results.
The next step in the preparation process would be to prepare your sieve(s) following your set industry standards. This step is mainly to ensure you have all the right mesh opening sizes in the right place, as different materials require different sets of sieves to obtain an even distribution of particles.
Calculate how long to sieve your material, especially with a sieve shaker. A typical test takes 10 to 15 minutes.
Test-Sieve-Stack

How to Perform a Hand Sieve Analysis

Hand sieving is a process where you use one sieve or, less commonly, a small stack of sieves to analyze materials. Before starting, make sure all sieves are clean and free of debris from previous tests.
You can then gather your representative sample and begin testing using the following steps as a guide:
If your test specifically requires the use of a test sieve stack, stack them with the coarsest sieve at the top and gradually move down the stack until the finest sieve is on the pan. Use the following steps as a guide:
NOTE: Hand sieving with a stack of sieves is most easily performed by placing the sieve stack on a table.
You may choose to hand sieve over a collection pan if retention percentage is critical to your results. If collecting the “pass-through’ material isn’t a concern, you can sieve over the ground when testing in the field.
No matter how you do your hand sieve analysis, remember that being consistent is very important.
You and any lab technician contributing to the analysis process should try to be as consistent as possible when tapping and rotating your sieves during a sieve analysis. This will help to ensure your team is yielding reliable results.
Establish a clear hand sieving process for your lab and consider using a mechanical sieve shaker to ensure consistent and reliable dry and wet sieve analysis.

Analyzing Your Results

After analyzing, weigh the material retained on each sieve to calculate test results. The total weights should match the weight of the original sample.
To that end, calculating the percentage of particles that passed through the sieve(s) is the most widely used technique for obtaining results. This calculation is achievable by figuring out how many particles passed through the top sieve, recording the percentage, and repeating this process for every sieve used during the analysis.
To work faster, you can use special software to process your results. Just enter the retained weight, and the software will give you the percentage weight retained and a particle distribution curve.
particle-size-analysis-lab-report
If you are interested in particle analysis result processing software, W.S. Tyler offers a program for $30.

Chapter 7

Particle Size Analysis Industry Standards

ASTM

Regarded as one of the largest regulating organizations within the particle analysis industry, ASTM oversees the standards encompassing the material, products, systems, and services you integrate into your particle analysis operation. The organization itself consists of hundreds of producers, users, consumers, government, and academia that span across over 140 years.
These volunteer members are responsible for creating technical documents that lay the foundation for the manufacturing, management, procurement, codes, and regulations that are employed throughout the particle analysis industry today. ASTM is often listed within other Standards as a supportive document.
ASTM E11

The ASTM E11 is a standard that oversees the production of test sieves, specifically the mesh openings, wire diameters, frame size, and cloth mounting employed. This standard was developed to ensure that any given ASTM compliant test sieve produces accurate and repeatable results no matter the industry.

ASTM E161
The ASTM E161 is a standard that sets the prerequisites surrounding the design and fabrications of electroformed mesh used in sonic sieves. This standard is to be used as a calibration reference, ensuring your sonic sieves yield accurate particle size distribution curves.

International Organization for Standardization (ISO)

Sharing similar qualities as the U.S. ASTM, the International Organization for Standardization (ISO) has published 22,701 international standards and related documents, covering industries from technology to agriculture. Both ISO and ASTM standards rely on expert collaboration to generate voluntary, consensus-based, market-relevant international standards that facilitate the innovation needed to overcome the obstacles seen throughout the particle analysis industry.
In terms of test sieve production, the ISO 3310-1:2016 standard regulates the mesh size, construction materials, and tolerances used to construct a test sieve.

American Association of State Highway and Transportation Officials (AASHTO)

Particle-Size-Analysis-of-Aggregate
The American Association of State Highway and Transportation Officials (AASHTO) is the international organization responsible for setting the technical standards that control highway system production at all stages. More specifically, the design, construction, materials, and all technical details implemented during the development of highways and bridges.
AASHTO is also responsible for setting guidelines that encompass sieve sizes and material testing requirements to create a sense of uniformity in all asphalt, cement, and concrete used to construct U.S. road systems.

What if I Don’t Have a Standard for My Material?

Occasionally, there are situations in which a specific material does not have any set standards associated with it. If the overall particle size of this material is known, the efficiency of your test sieve analysis can be calculated using test sieves, both above and below the nominal size, that are compliant with ASTM E11 standards.
Once the particles reach an ideal consistency, you can then begin to check the quality of future production lines using test sieves. For more information about testing unregulated material, refer to the websites of the various organizations and search for materials with identical characteristics.

Chapter 8

Maintaining Your Test Sieves

1. Regular Visual Inspections

Visually inspecting your sieves is an easy technique that can help you identify any wear and tear that may hinder the accuracy of your results. It is recommended that you form and execute a regular inspection schedule that compliments that amount in which your sieves are used.

When inspecting your mesh, you should be watching for dents in the screening media, scratches in the screening media, and any cracks in the epoxy.

Test-Sieve-Cloth-Dent

Dents in the Mesh

Hold your sieve up to a reliable lighting source and examine to see if the wire mesh screen is still drum-tight. If any dents are identified, the test sieve should be taken out of any testing procedures.
These dents are likely to cause the integrity of the mesh openings to be compromised, which is one of the leading causes of false analysis results.

Scratches in the Mesh

Using the same methods and ideology with dents, you should examine your sieves to identify any scratches in the mesh. Scratches often turn into rips and tears, which will render your results unusable.

The best way to ensure accurate and repeatable results is to replace the sieve if the scratch is prominent.

Cracked-Test-Sieve-Epoxy

Cracks in the Epoxy

Test sieve epoxy is a strong adhesive that connects the mesh screen to the sieve skirt. It can withstand harsh materials like aggregate but is susceptible to wear and tear. Regularly check for cracks in the epoxy seal to prevent particles from passing through and causing inaccurate sieve results.

2. Sieving Correctly

Ensuring that you are using your test sieves properly is an easy step to keeping your sieves in pristine condition. If you or any of the lab technicians are doing things such as forcing particles through the sieve by pushing them, you run the risk of pulling the mesh from the frame/skirt.
Another common mistake is not using the correct sieve size to sample weight ratio, which was discussed above. This often causes blinding, which is when particles become logged in the mesh openings, clogging them and preventing any other particles from passing.
In some cases, the particles become stuck permanently, and the sieve must be replaced to ensure accurate and repeatable results.

3. Cleaning Your Sieves

Keeping your sieves clean and free of any debris from past testing is one of the most critical steps in achieving reliable results. To clean your sieves properly, follow these five easy steps:
Nylon-Test-Sieve-Brushes

Brushes

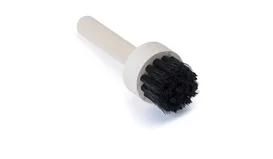
Several brushes are designed for cleaning test sieves, using brass or nylon bristles to clear debris without damaging the mesh. For delicate screens, use nylon brushes to avoid damage, while brass brushes are suitable for larger mesh openings due to their durability.

Ultrasonic-Test-Sieve-Cleaner

Ultrasonic Cleaners

There are some mesh opening sizes that can prove difficult to clean, as they are too fine for the bristles to reach the opening properly. Ultrasonic sieve cleaners were designed to combat this as it uses ultrasonic vibrations to dislodge particles from the finest of mesh openings.

Important Don’ts

There are a few things that you should avoid when cleaning your sieves. The five don’ts are:

4. Storing Your Sieves

How you store your sieves is critical to keeping the different components of the sieves in tip-top shape. For maximum longevity, it is recommended that you store your sieves in a clean, controlled environment that is away from moisture.
Test sieves should also be stored in areas where dramatic temperature variations are not present. Extreme temperature shifts may cause damage to the sieve, specifically the epoxy.

5. Recertifying Your Sieves

As you continue to use your test sieves, you will want to ensure you continue to yield accurate results that comply with your industry standards. 

Test sieve certification is a means of stating or verifying that any given sieve meets or exceeds written standards. It assures that the sieve was assembled to perform at a specified level of performance.

During the certification process, the sieve is first visually examined to identify any tears, wrinkled mesh, or cracks in the epoxy. The sieve is then scanned using a specialized microscope that analyzes the mesh openings to ensure no stretched or clogged openings are present.

The wire diameter is also verified during this examination.
Once the sieve is confirmed to have met the required certification level, it is shipped back to your facility with a document that verifies the sieve’s technical information. To that end, if your sieve does not pass, you will be informed, and the next step would be to purchase a replacement sieve.
To help make sure you keep up with your sieve’s certification, use the following schedule as a guide:
table

Conclusion

Test sieves have been used to accurately separate the particles of various materials for centuries. With the ability to be customized for your specific needs, test sieves are regarded as one of the most reliable and efficient tools currently on the market.

But while test sieves are easy to implement and use, you must find a manageable sample weight to sieve size ratio for best results. With regular maintenance and upkeep, test sieves will consistently produce accurate and repeatable particle analysis results.